
Setting up SSO for your internal users may sound intimidating and time consuming, but it’s really not as bad as you’d think. In this blog, we’re going to go over how to set up SSO for your Salesforce org.
Introducing Single Sign-on (SSO) for Salesforce
Let’s face facts: the login process can waste a lot of time and cause a lot of frustration for Salesforce users. You either have to make sure to remember your password, or store it in a password manager app, but because you have to change your password every few months in Salesforce, you can’t always be sure that your app will have updated correctly with your current password. Even worse, if you can’t remember your password, or make too many failed-attempts to login, you run the risk of getting locked out of Salesforce entirely. You may end up needing to track down your system administrators so that they can help you reset your password. This can cause users a lot of hassle and a lot of stress, especially if you’re in a meeting, or are speaking with a client or a customer and need to access Salesforce right now.
One way around these typical struggles is implementing single sign-on (in short: SSO) in your organization. With SSO implemented (eg. Microsoft active directory or AWS) the users only have one username and password and SSO allows access to many other (connected) applications, such as Salesforce. This means that there is one thing less for the users to worry about in their daily routines.
According to Salesforce, users can spend up to 20 seconds on each time they login. Assuming an organisation with about 100 users, every year, this can add up to almost a month’s worth of time spent wrestling with accessing the system - that’s as much time as an employee might spend a year on vacation! SSO enables users to access Salesforce with just one click, allowing your users to login much more easily. Not only this, but SSO brings with it the added benefit of increased security.
Setting up SSO for your internal users
Before we look at how you set up SSO for your users, you will need to take care of a few prerequisites, in order for the SSO setup to work correctly.
Prerequisites before turning on SSO in your org
Before you can set up SSO for your users, you must have a domain established with My Domain in Salesforce. My Domain provides a custom URL for your company, so that your users feel they are seamlessly navigating through your company data, without leaving the company ecosystem. You can use My Domain to establish a domain specific to your company. Establishing a domain in Salesforce gives you more control over the login process. It is also necessary for setting up SSO successfully.
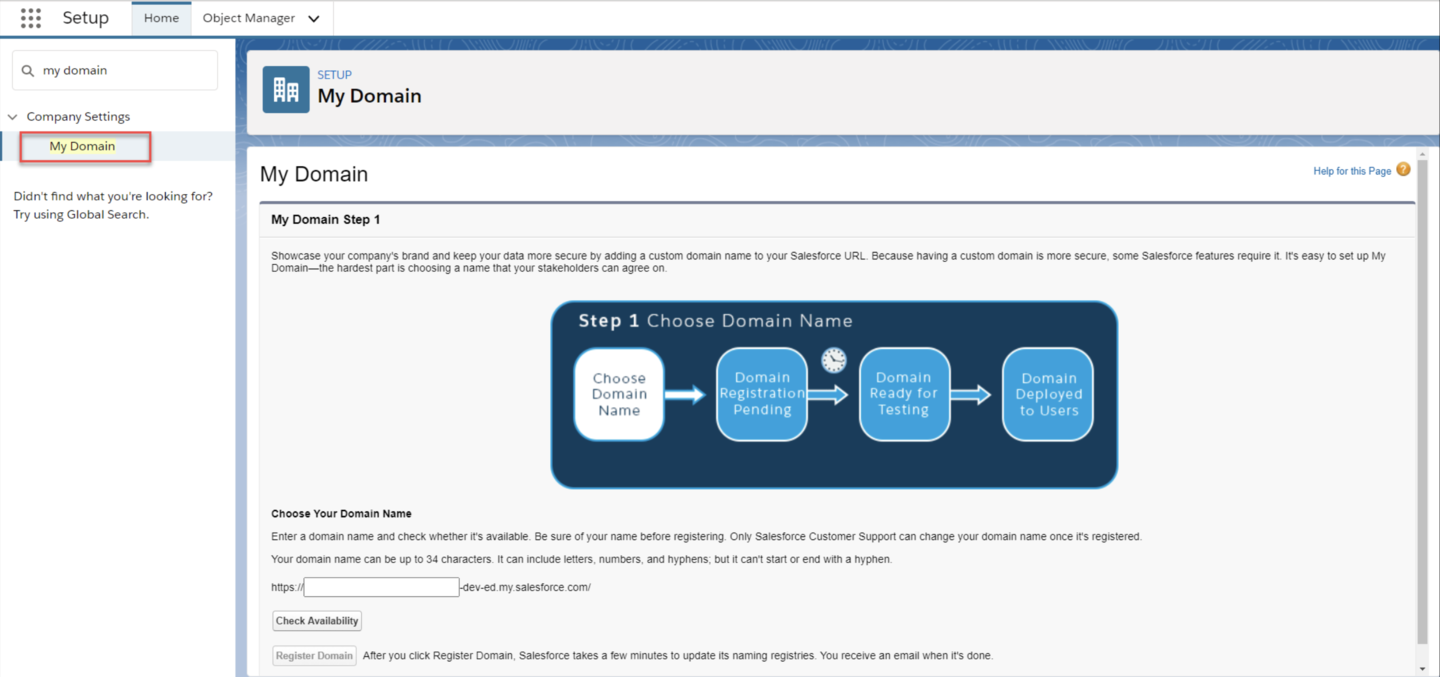
You can find the My Domain setup page like this:
Setup menu > Quick Find > My Domain.
Setting up My Domain is a 4 step process:
Step 1: Fill in your company domain name and click “Check Availability”. Once you have established the domain for your company is available, you will need to register your domain so that it can be assigned to your org.
Step 2: After completing Step 1, you will receive an activation email. Use the link provided in the email to check if the domain is working correctly. Please ensure to complete this step carefully, and not to rush it, or skip it.
Step 3: You can now set up your My Domain policies including your “Login Policy” (checking the box here prevents users from accessing Salesforce through the standard domain, and instead requires them to go to your custom domain to access Salesforce), and your “Redirect Policy”.
Step 4: Customize and deploy your login page. You can customize your login page to make it more familiar to your users. For instance, you can replace the Salesforce logo with your own and change your background and login button colors.
You will need to make sure you have given your users the proper permissions to use SSO. Make sure “Two-Factor Authentication for User Interface Logins” has been selected under
“System Permissions”. You can do this by permission set or by profile.

Now that you have set up your domain you can continue to the rest of the SSO setup!
Setting up single sign-on in your org
In just a few simple steps, you will have your users saving time, and provide more security for your org. Let’s get your SSO up and going!
Step 1: Decide on a unique attribute for each user. This can be in the form of their username, User ID or what is referred to as a “Federation ID” (a unique user ID). As you set up each of your users, and are editing each user page, you will see that there is the option to input a Federation ID. Federation ID is a useful form of identification if the user belongs to multiple orgs, but if they only belong to one org, a username should suffice. If you need to add in a Federation ID later on, remember, you can always do this in a mass update to your user records.

Step 2: Your SSO identity provider will supply an Identity Provider Certificate that you will need to upload to Salesforce, along with other details that are required for the setup. Those details help configure the Security Assertion Markup Language (SAML). We won’t go into too much detail about SAML in this blog.
Step 3: Link your Provider to Salesforce. In Step 2, you provided details for Salesforce to learn about your specific identity provider. Now you need to provide details for your identity provider to recognize your Salesforce instance. On the SAML single sign-on Settings page, input your custom URL into the Entity ID box and click “Save”.
Once you have completed Step 2 and Step 3, the systems will be able to recognize each other.
As always, once you’re done with the setup, you’ll want to test it. Start by setting up SSO for just a few users at first to make sure everything works, before rolling it out to your entire workforce. You don’t want to make a big announcement only to find that there are still major issues to address.
If you feel like you still need a little practice, check out this Trailhead module on User Authentication to learn more.
Resources & Further Reading:
User Authentication | Salesforce Trailhead