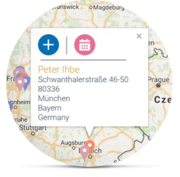
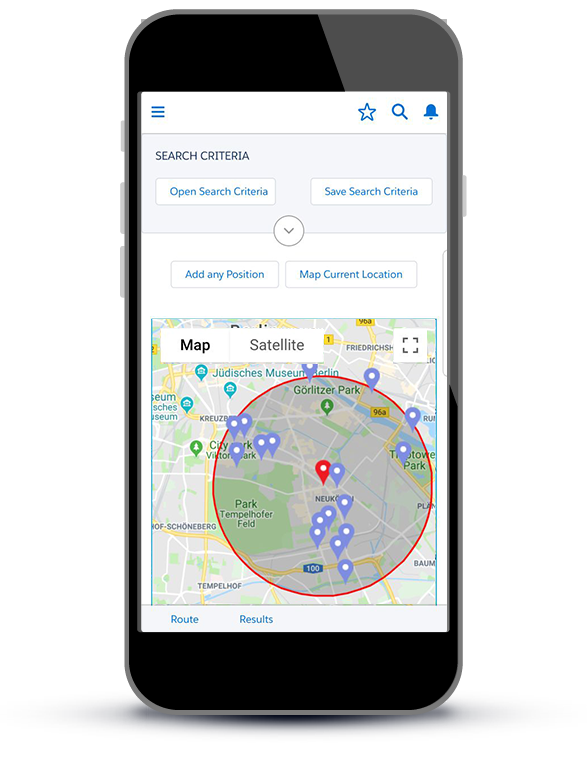
Visualise your data on a map
Geocode your accounts, contacts and leads and display them on Google Maps via record pages and list views - including list views for opportunities and cases. Customise which record information you want to display in an info window on Google Maps.
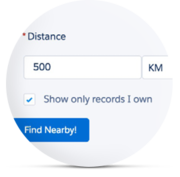
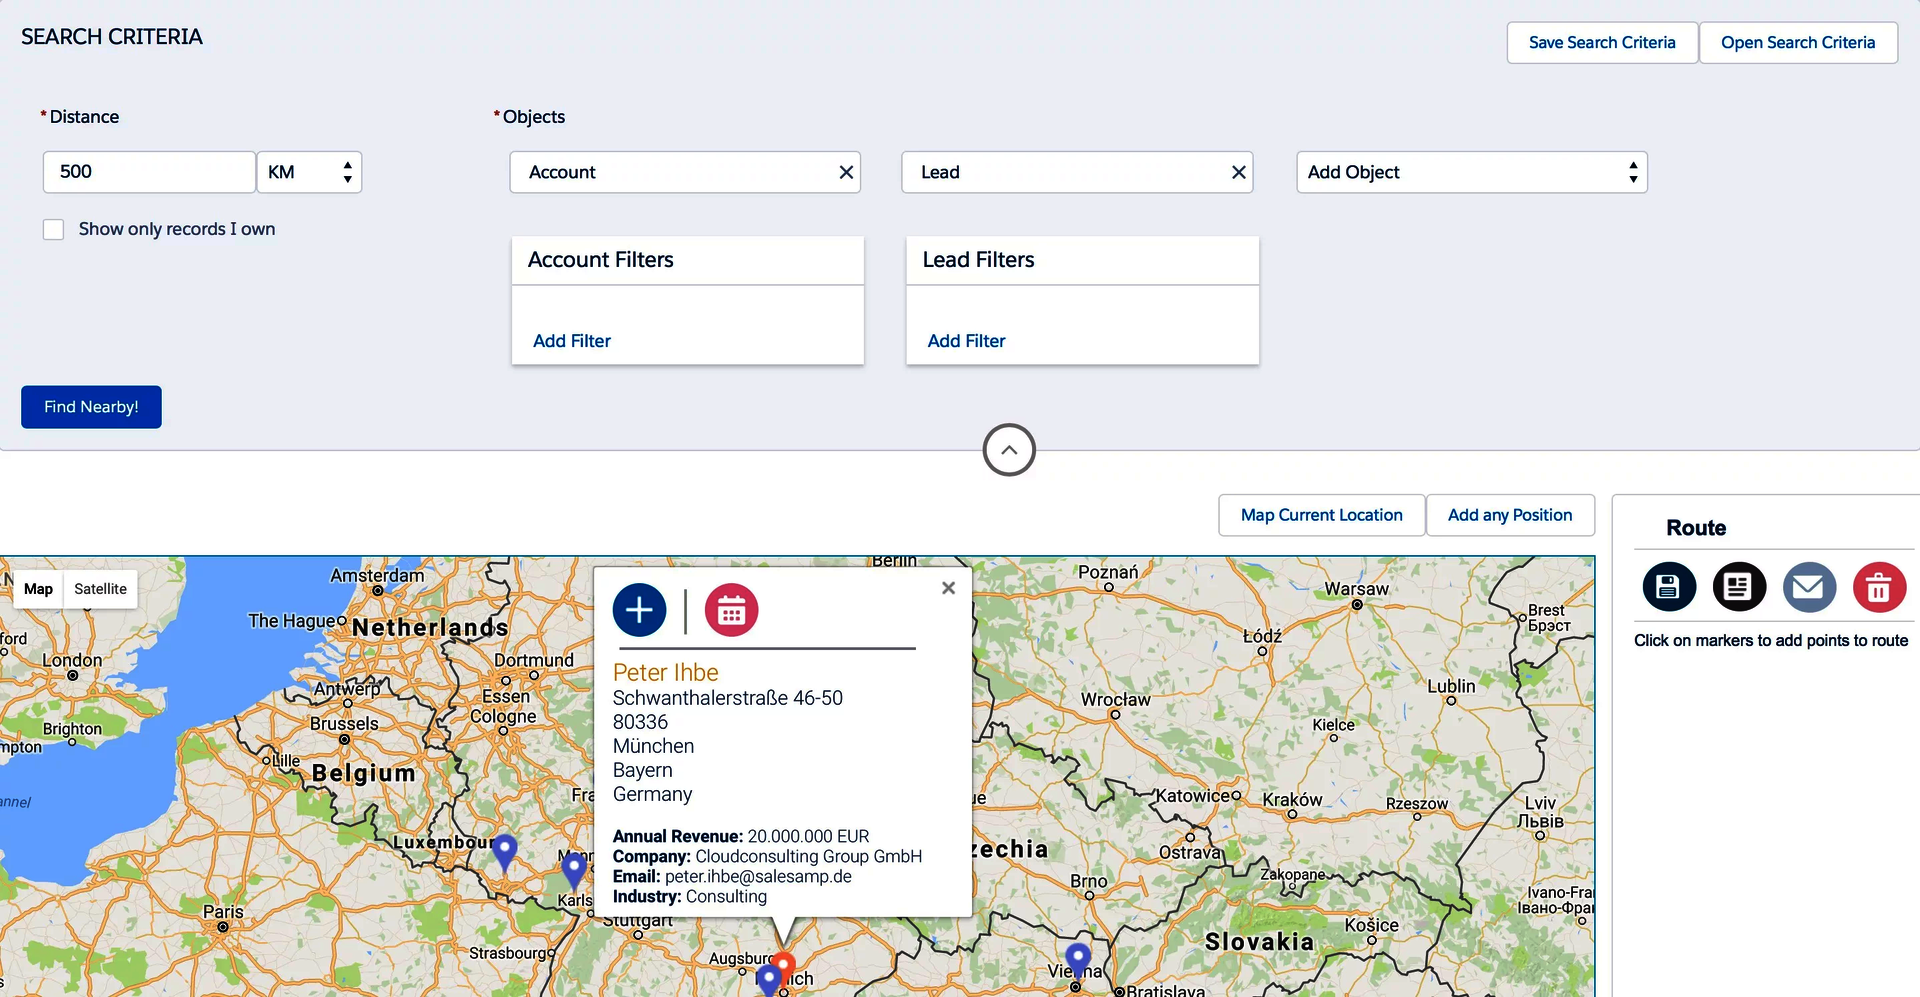
Find nearby search
Search for accounts, contacts and leads, individually or in combination. Define your search area from any given location.Refine your search by setting filter criteria and save your preferred filters for each record for reuse.
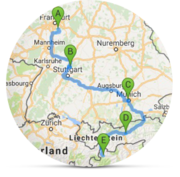
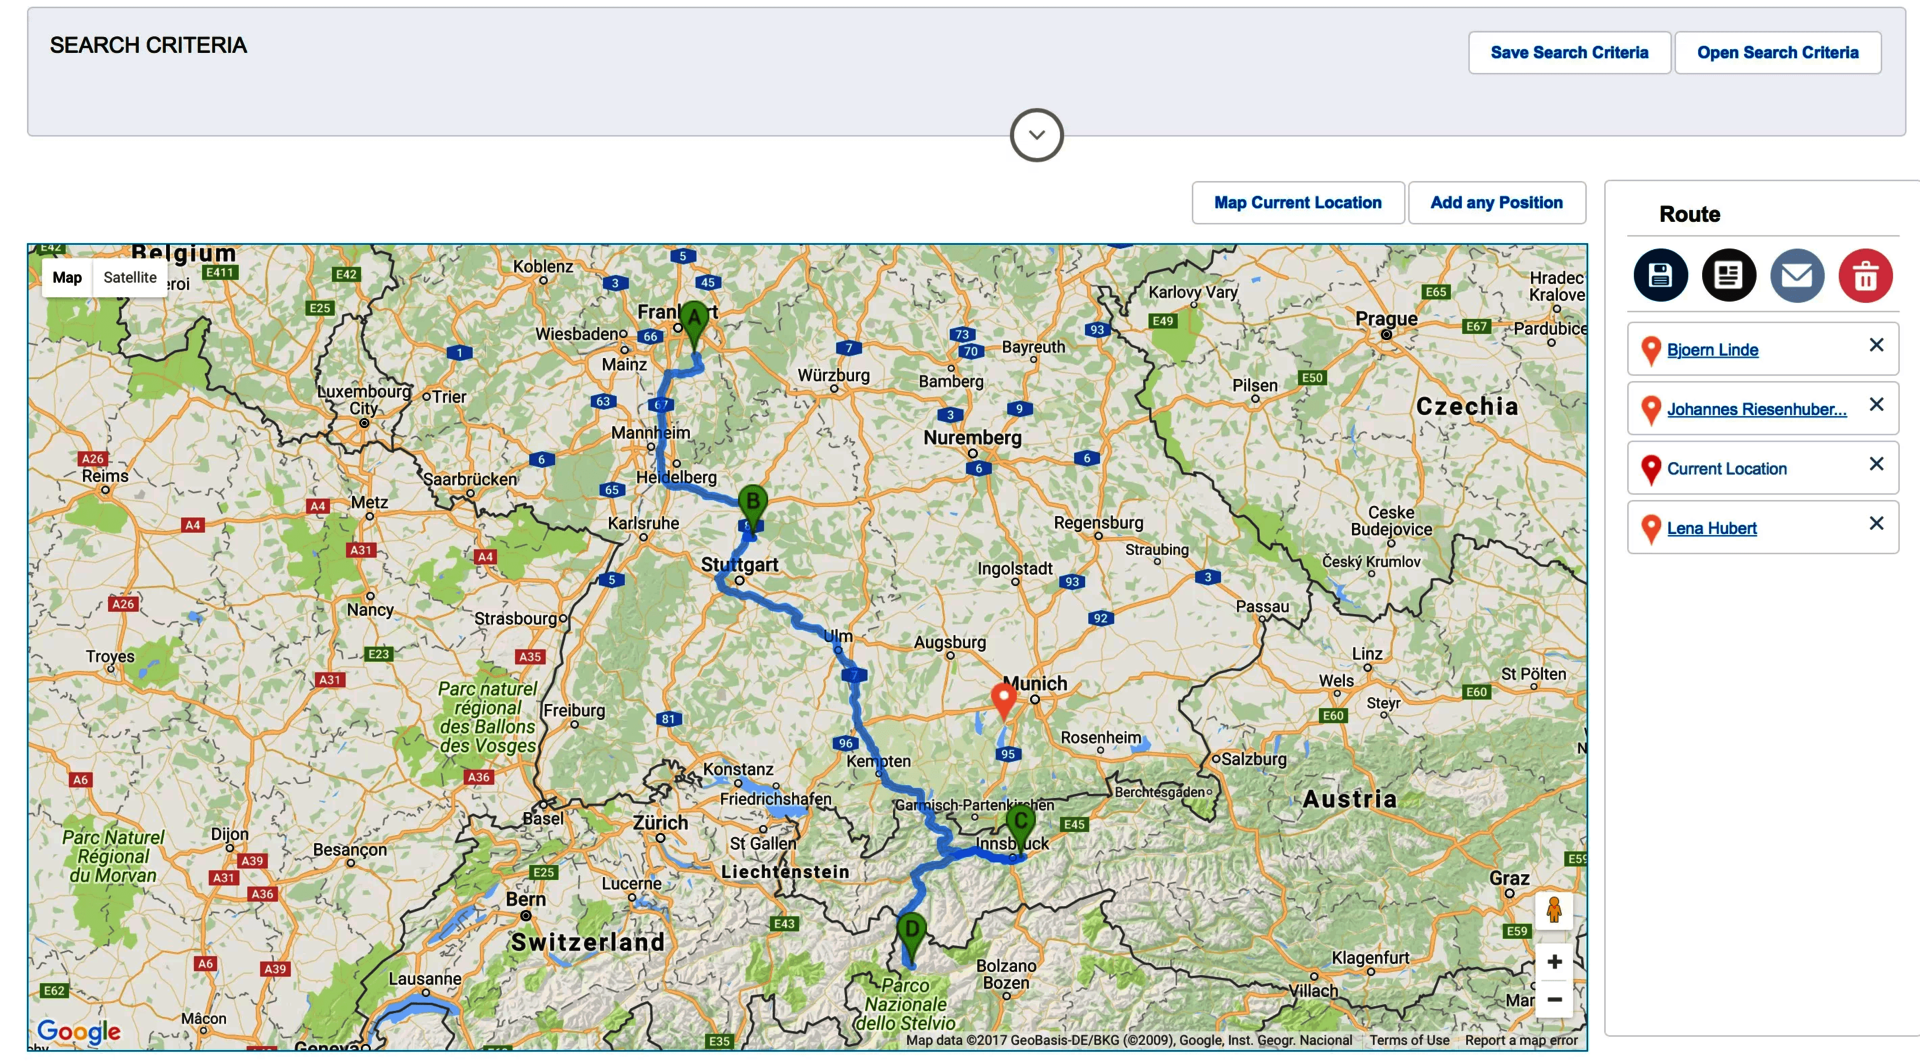
Create routes
Create routes with multiple destinations from your search results and list views. Add destinations via map view or from the list view with your search results. Get detailed driving instructions on your route and share them via email.

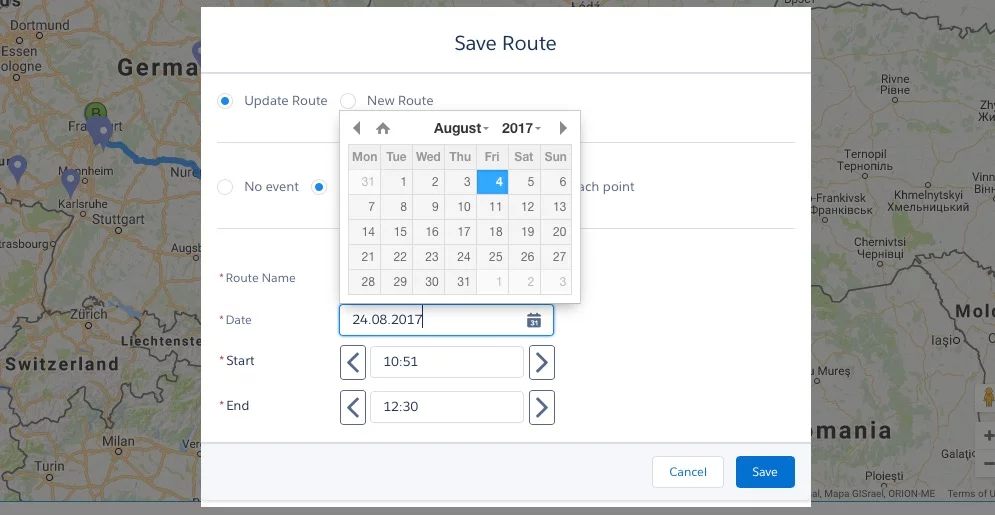
Save routes
Save your routes to use them again in future. You also have the option to create events and calendar entries for the route as a whole or for multiple entries, one for each location on the map, which are then linked to the route so you can easily return to your map when you need to travel.


tourManager24 is an easy-to-use mapping tool.
It provides solutions enabling you to optimise sales, and service planning, planning as well as trip organisation and management. It is designed for both domestic and international usage, tourManager24 and offers great value and a wide range of benefits for you and your field staff.

Starter
up to 10 users
EUR 8,90
(9.90 USD)
per user/per month
billed annually
Growth
11-50 users
EUR 7,90
(8.90 USD)
per user/per month
billed annually
Enterprise
+50 users
EUR 6,90
(7.90 USD)
per user/per month
billed annually


First steps after installation
Step 1. Geocode your records
To “geocode” a record means to convert its address into geographic coordinates (longitude and latitude) and save those values in Salesforce. These coordinates are required for all accounts, contacts and leads that you want to display on a map.
tourManager24 does this job for you by using the Salesforce standard geocoding option.
NOTE: This option is selected by default, but before you can enjoy all the functionalities of the tourManager24 app, please ensure you have set up geocode clean rules in your org. Assistance on how to set up and activate geocode clean rules can be found in the tourManager24 installation guide and on the Salesforce Success Community page.
tourManager24 also provides its own geocoding option. To use this option, you will need to request an API key and a client ID from google. Please refer to the "get API key" support page to learn how to do this. Detailed information about how to set up this geocoding option can be found in our tourManager24 installation guide.
Step 2. Display a record on the map
To display a record on the map, simply add the tourManager24 “Show on map” button to all page layouts for accounts, contacts and leads that will need to be accessed by the app’s users.
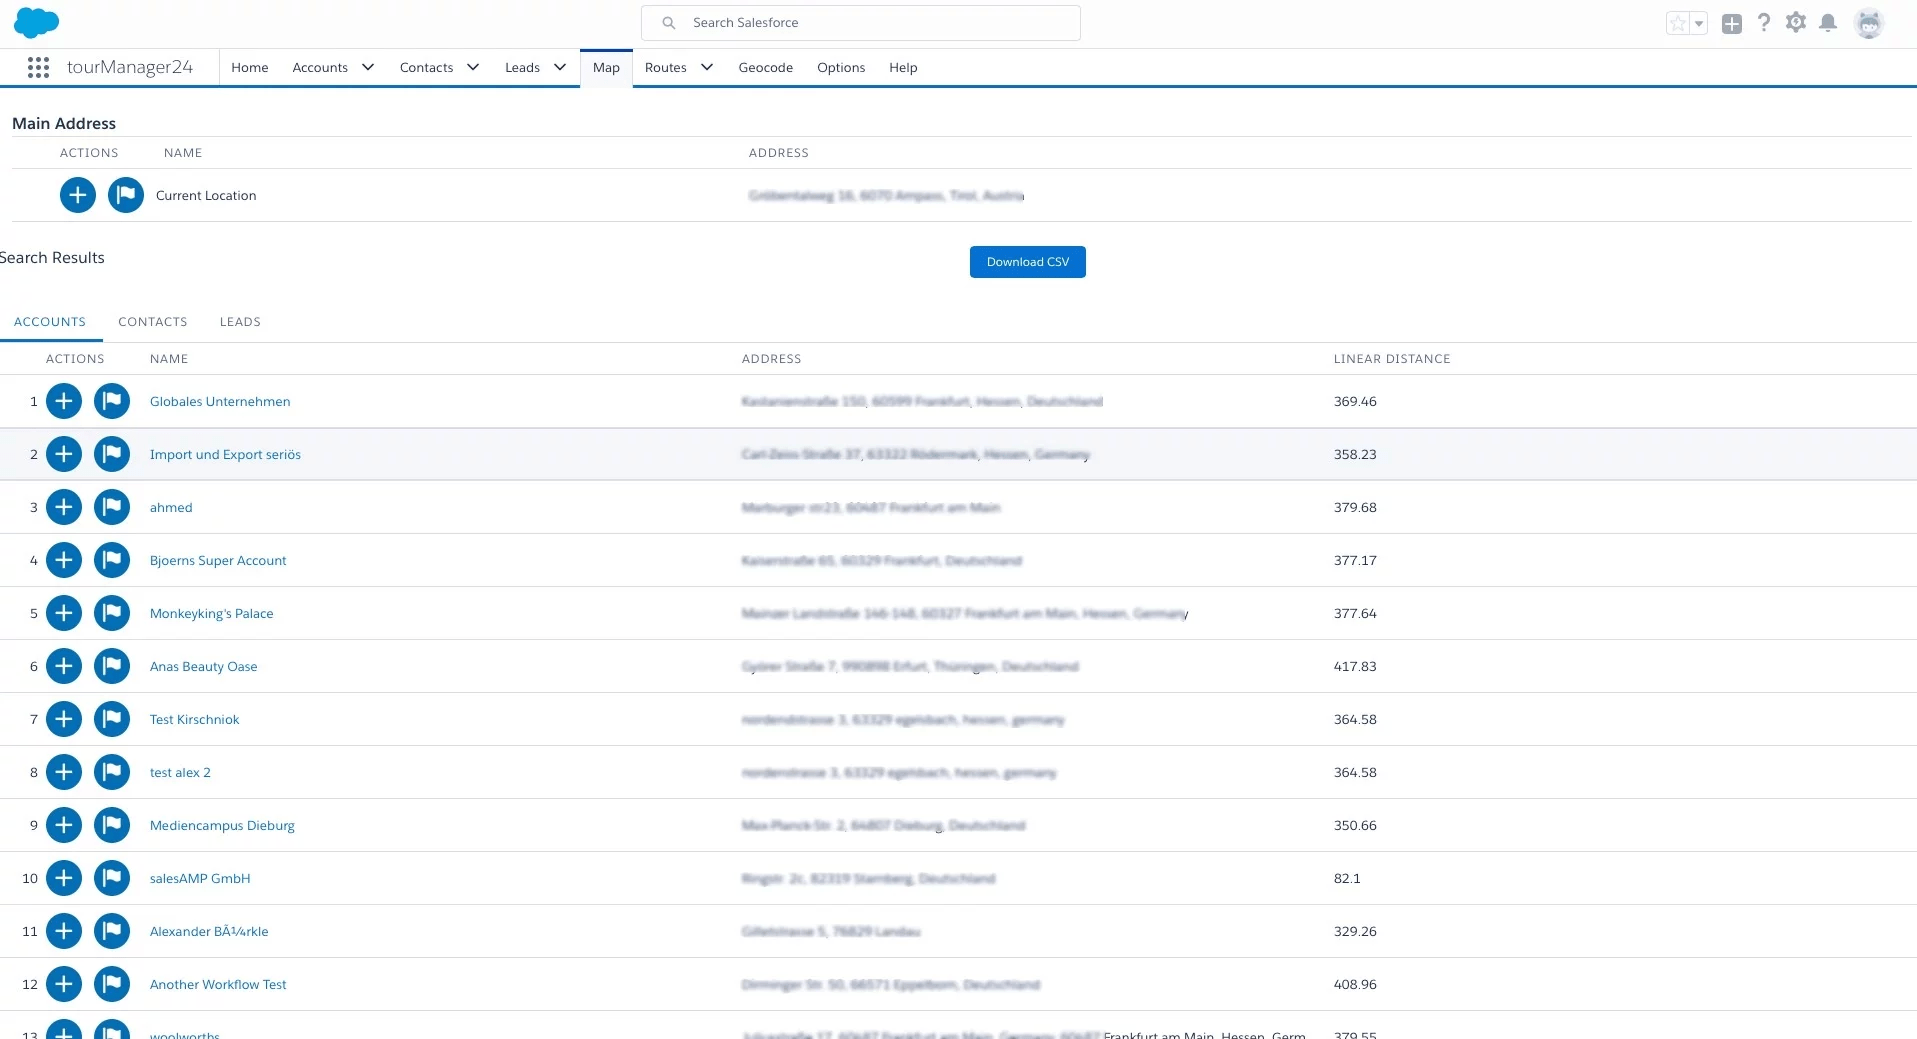
Step 3. Display multiple records on the map
tourManager24 lets you display records from list views of accounts, contacts, leads, opportunities and cases on the map. For opportunities, the associated account will be displayed on the map. For cases you can choose whether to display the associated account or contact.
To enable this option, add the “Map + object name” button (e.g., “Map account”) to the corresponding list view layout. Details on this step can be found in the tourManager24 installation guide.
This problem occurs mostly due to triggered validation rules or empty required fields which, in both cases, prevent updates and disrupt the geocoding process. Administrators will be notified via email whenever the tourManager24 geocoding process is stopped. This email will identify the cause of the interruption. Additionally, the tourManager24 package provides the following three reports which help to determine which validation rule or field has caused the disruption:
- Account Geocode Error Report
- Lead Geocode Error Report
- Contact Geocode Error Report
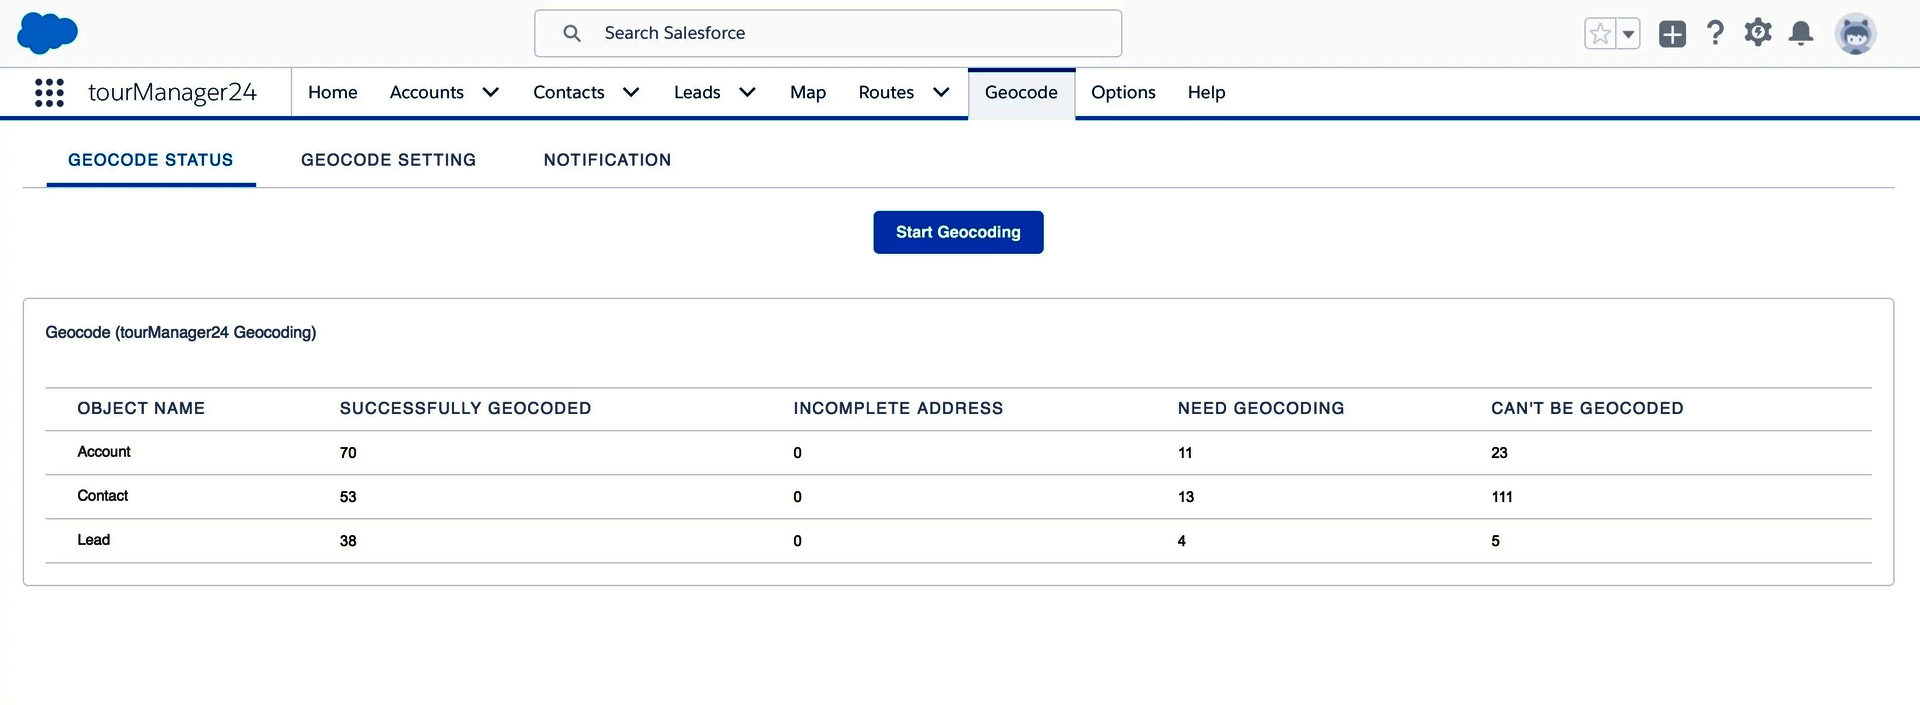
You can get an overview of the status of all records within the geocode tab. You can also run a report to get more details on which records could not be geocoded and why.
The status of the geocoding process can be viewed under any of the following fields for each record: latitude, longitude, geocoding status and geocoding error. Putting any of these fields on page layouts will provide you with information on the status of a record. We recommend you to set these fields to read-only on the page layouts.
The geocoding status may be shown as follows:
- Needs geocoding: the record has never been geocoded or its address has been changed since the last time the geocoding process was run.
- Geocoded: the address was successfully geocoded and the result has been saved in the latitude and longitude fields.
- Address not complete: the street and/or city fields for the address are empty.
- Cannot be geocoded: the geocoding server could not geocode this address. This may be because the address is a P.O. box address or because it does not exist. Check the geocoding error field for more details.
1. Create event for route
One event is created for the route (this will be associated with the saved route).
2. Event for each point
An event is created for each point on the route. For these events the “related to” field will contain the record to be shown on the map (the location) and the "route" custom field will contain a link to the route (you will need to add the "route" custom field to each event's page layout).
As the error message suggests, the user has not been granted sufficient access to tourManager24 objects, fields and other components. In this case, the user is lacking therequired permissions to see certain Visualforce pages. You can grant all necessary permissions to use the tourManager24 App by assigning the permission sets provided with the tourManager24 package to your users.
In tourManager24, we provide two options for geocoding your data. If you’ve just installed the app for the first time, the default will be set to the Salesforce standard geocoding option. In order to geocode your data with this option, you will need to activate the data integration rules. You can do this under Setup > Data Integration Rules.
Callback Service
Use our contact form to arrange a callback.
Send us an email and we'll respond within one business day.
Call
You can reach us by telephone from Monday to Friday from 9 am to 6 pm.