
Whether your end-user is in sales, services, or both, they are likely to spend a lot of time searching for information in Salesforce. Let’s talk about how you can setup the utility bar in Salesforce Lightning App Builder and use it for faster searches in Salesforce.
Making life easier for your end-users
If they are brand new to Salesforce or your company, navigating from one point to another may take considerable time out of their day. This means they are being paid company money just for clicking around. It isn’t only about money of course. Nobody likes spending time on administrative tasks, when they could be spending time on more productive activities. But there are worse things than members of your workforce becoming frustrated. Poor navigation practices can perpetuate mistakes, some of which can be costly. You don’t want members of your team accidentally logging the email they just sent with the wrong company, or the wrong contact! Mistakes like these can make it harder to get a good overview of customer health. It can even make you look disorganized if someone ends up following up, mistakenly assuming the customer has not been contacted for some time. Luckily, there is an easy way to help your end-users navigate through Salesforce, save time and improve their accuracy.
Let’s talk about how you can use the utility bar to help with some of these challenges. Please note, if you don’t have it set up, you won’t currently see it in your org.
Put simply, the utility bar is a bar at the foot of the page where you can set up tabs for commonly used Lightning actions, processes and components. Rather than an inexperienced end-user trying to remember how to navigate back to a record they saw earlier in the day, or having to remember to execute regular actions, such as mass updating field values to keep the data clean and tidy, you can set these up as shortcuts in a utility bar, so your end-users know where to look. Let’s go over how to set up a utility bar. We’ll then go through how to add a Recent Items component, a useful function allowing users to make recently accessed records readily available!
Setting up the utility bar
You can set up your utility bar and add a Lightning component in just a few easy steps. First, go to your Setup menu, and search in the Quick Find bar at the top for “App Manager”. App Manager will appear in the drop-down menu. Click on it for it to come up. You now need to determine the app for which you would like to add the utility bar. Remember, an app is a collection of objects displayed as tabs along the top of your page. It may be that your sales team uses the Sales app, and the services team uses the Services app, or it could be that everyone in your company who uses Salesforce uses the same app. Once you have selected
which app you want to host your utility bar, click the drop-down arrow beside your app, and then click “Edit”.
In this example, as you can see below, we are adding a utility bar to the Sales app. You will have the option to choose either Lightning or Classic. Make sure you choose the Lightning version, and not the Classic version.

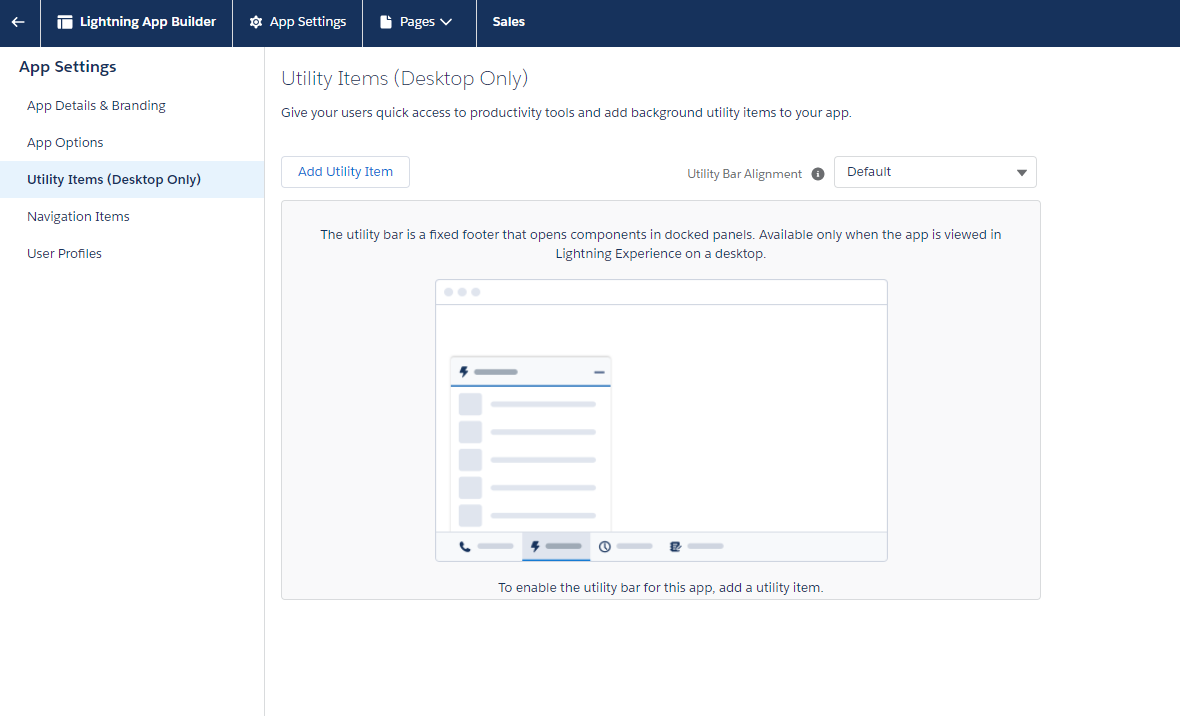
You will now be on the Lightning App Builder. You will be able to see a list of options under the heading App Settings. Choose “Utility Items (Desktop Only)”. This will take you to the landing page for Utility Items. It should say “To enable the utility bar for this app, add a utility item” at the bottom of the page. Now click on the “Add Utility Item” button.
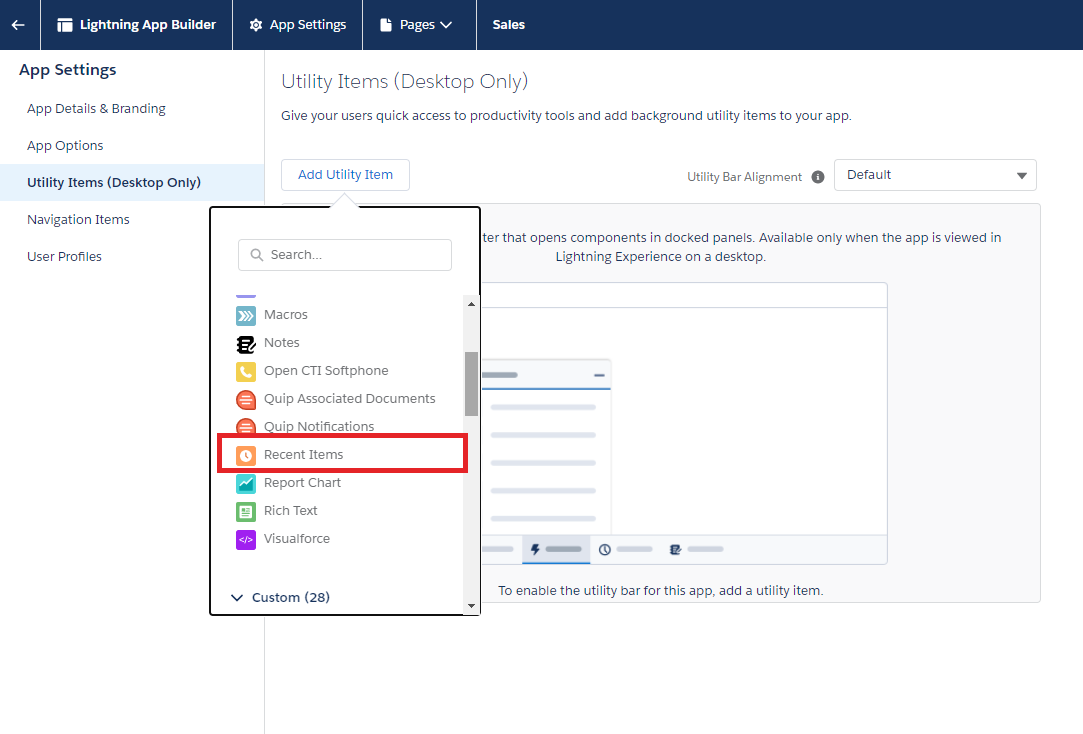
Once you have clicked “Add Utility Item”, any Standard and Custom Lightning Components you have created will be available for you to select. In this example, we will select “Recent Items”, as shown below.
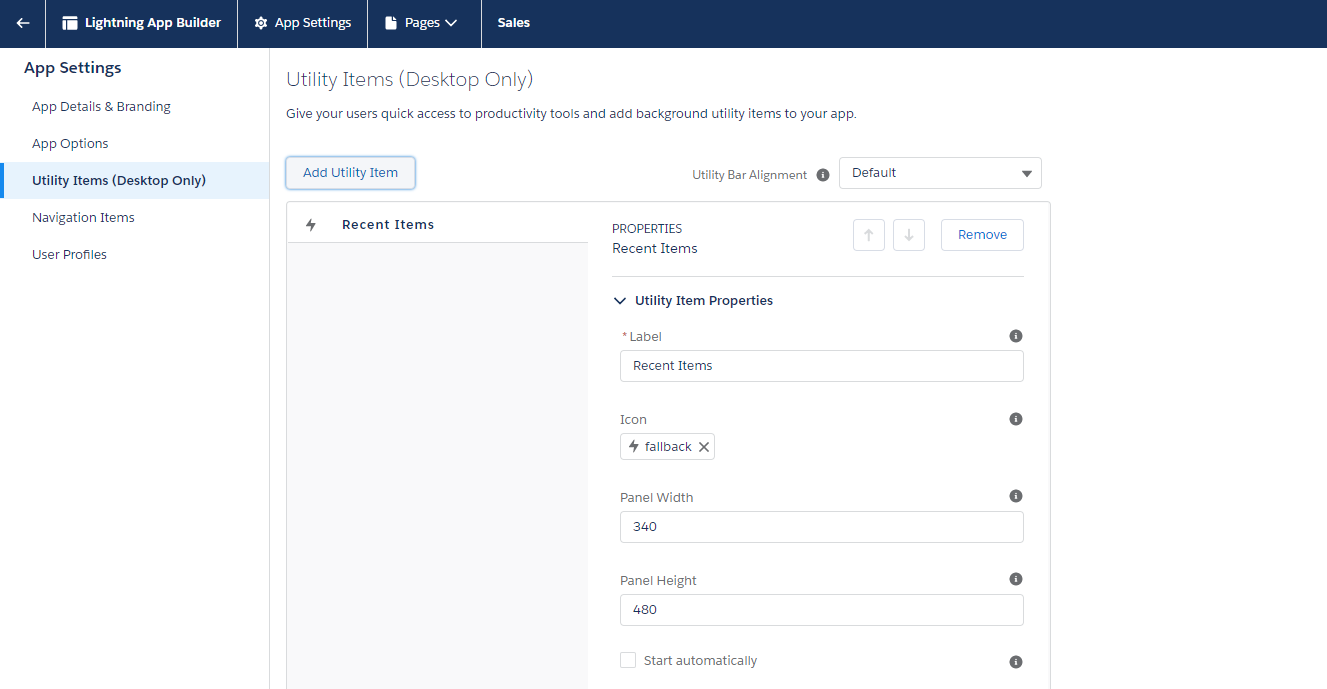
Once you have selected your component, you will have the option to choose the label, the icon, and the panel size for that component. You can also check the checkbox which will allow components to “Start automatically”. This is a useful function when the component needs time to initialize, as it means you can start loading the data when the app first opens. It is also useful for when the component is related to a voice action, as it lets users receive incoming calls before they open the utility. Leaving the box unchecked allows end-users to have manual control over when they use the utility bar. Consider how you and your team will make use of each component to decide which option you choose.
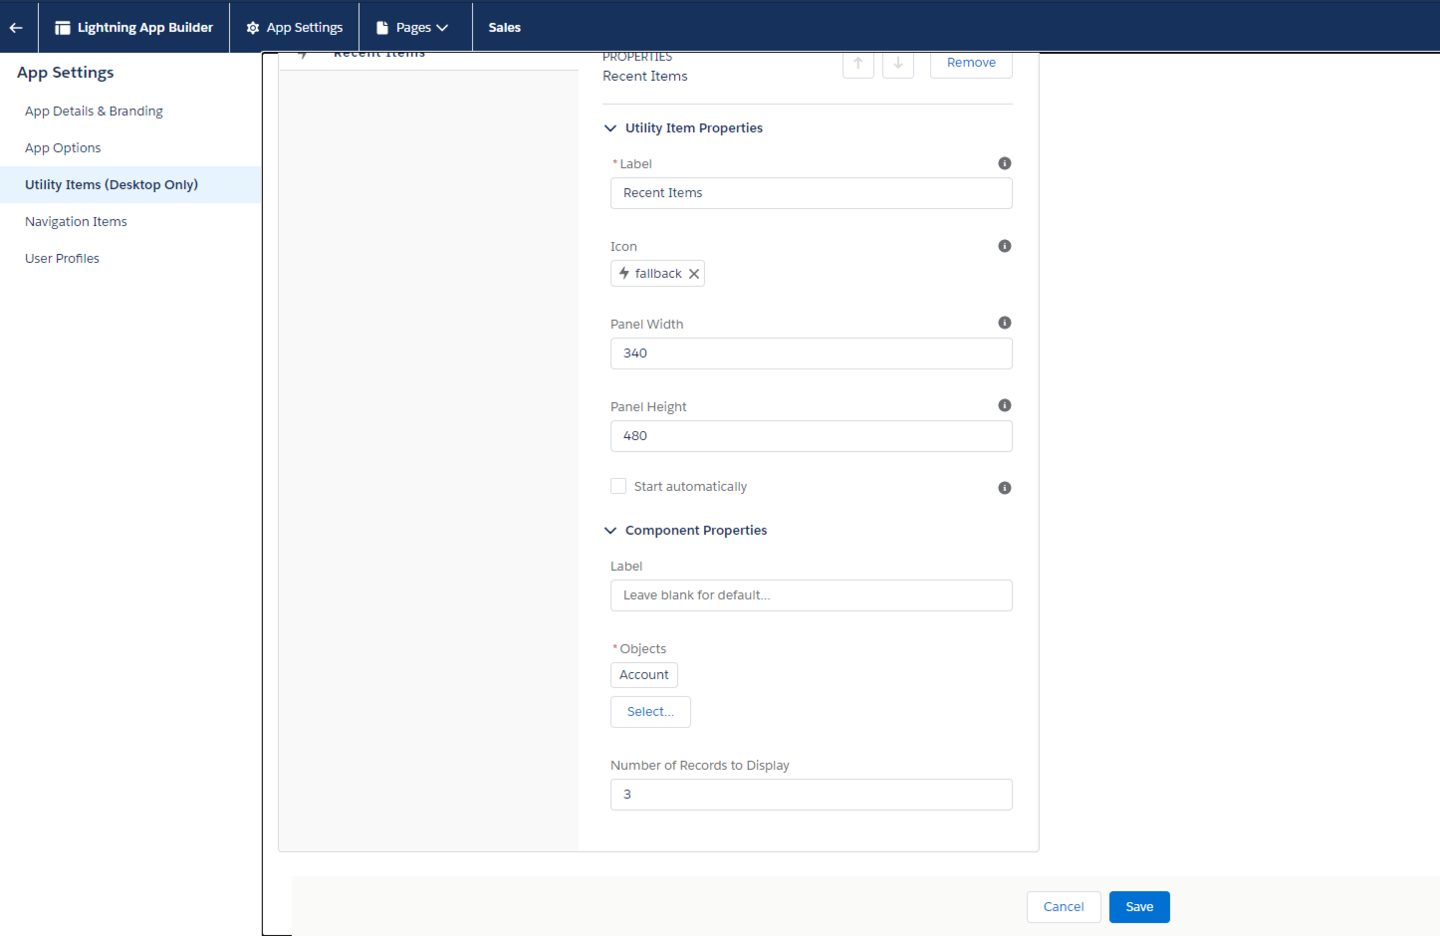
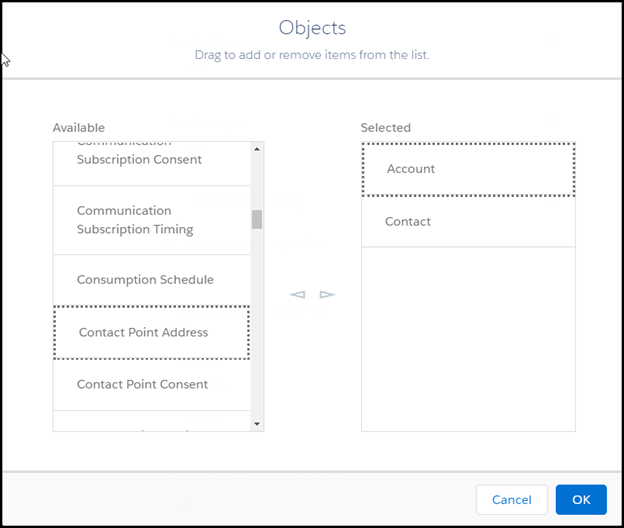
You can now set up the properties for your chosen component. In the example below, we can see how to do this for Recent Items. Remember, there are different options available for different components. For Recent Items you can choose a label for the component, the objects, and select the number of records you want to display. By default, for Recent Items the object displayed will be “Account” (account records). If you want to add the “Contact” object, click on the “Select” button, and then select the “Contact” object.
Once you have clicked “Select”, a pop-up window will appear which allows you to drag objects from a list of available objects on the left, to objects you have selected for your component on the right. To select the object, click on the object name in the “Available” column. You should now see a dotted-line around the object. Now you can move it to the “Selected” column. You can also remove objects from the “Selected” column using the same method. When you are finished, click “OK”.
Once you have finished adjusting the properties of your component and any other utility properties, make sure to save any changes you have made by pressing the “Save” button at the bottom right before you leave the page.
Using the utility bar
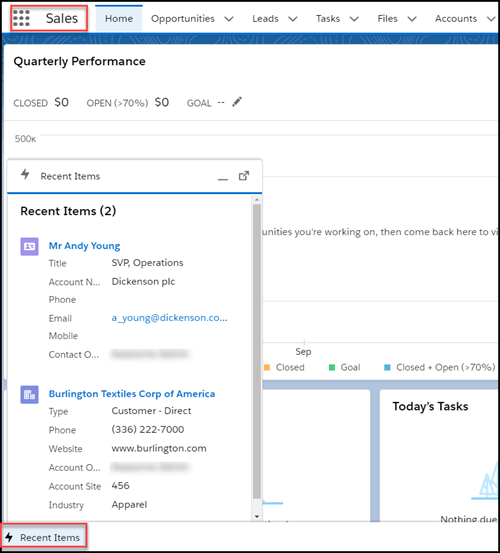
After setting up the utility bar, and adding a Recent Items component, providing they are using the App you specified earlier, users will be able to access their Recent Items for both Account and Contact records on any page in Salesforce. In our example, we set up our utility bar for the Sales app. This means that users must make sure they are working in the Sales app if they want to use the utility bar. The app you are currently working in is indicated in the top left corner. If you need to navigate to another app, click on the square (pictured below, to the left of where it says “Sales”) to change apps.
In order to use the component, you simply click the component for Recent Items in the utility bar, and records will appear as a vertical list.
Remember, if you would like to make any changes, you can always go back and make adjustments to the width, height, name, and any other properties of your component.
The utility bar is a great tool to help your end-users navigate Salesforce more efficiently, and ultimately to save time in the working day. You don’t have to stop at just adding one component. If you can improve other processes with a custom component, remember you can always add multiple components to the utility bar.
This is a great, customizable tool to make your org more efficient.
Photo on pixabay